Raids are powerful enemies that can be summoned through special means or very rarely found naturally in the overworld. There exists 3 main different kinds of raids:
- World Raids, fought on the overworld, summoned by players or naturally spawned
- Kingdom Raids, started by expending Kingdom Orns
- Super Raids, event raids (summoned by players) who are more powerful than other raids
Raid mechanics
Fights
Drops
Drop % Material drop rolls and item drop rolls Can't drop items above your tier (OHB, kingdom raids) No Sphinx Tail
WRBs give high amounts of XP up until T9. The XP requirements at T10 are such that WRBs no longer are the best XP source. The XP/Orn ratio for WRBs is very high! This means that, if you feel you like you need more Orns than XP, WRBs are not the right focus for you now. With the 3.0 update, WRBs now also drop a decent amount of random materials, including rarer end-game materials (e.g.: Cursed Ortanite), mid-game boss materials (e.g.: Broken Stone) or herbs.
Kinds of Raids
World Raids
Spawning
World Raids (called WRB, for "World Raid Boss") are encountered on the overworld.
They scarcely spawn on the overworld and are so rare that their exact spawning mechanics are impossible to research.
They are usually summoned by players through the use of different scrolls, the most common one being the ![]() Summoning Scroll.
Summoning Scroll.
Using a WRB-summoning item will spawn one WRB in the vicinity of the player's location. Since Wayvessels change a player's location, if the player has travelled through a Wayvessel, the WRB is summoned at the Wayvessel location, rather than the player's GPS location. A WRB is randomly selected from the "Raid Pool" associated with the item and summoned. The Raid Pool is different for each summoning item and may vary further depending on active events. It also changes depending on the player's tier: a player can only summon a WRB of its tier, 1 tier below or 2 tiers below (for that matter, T11 counts as T10, so both T11 and T10 can summon T8, T9 or T10 WRBs).
A WRB can either be "public" or "private".
When publicly summoned, the WRB is visible and can be attacked by any nearby-passing player (or through a Wayvessel).
When privately summoned, the WRB is only visible and can only be attacked by any nearby-passing party member of the player who summoned the WRB.
![]() Summoning Scrolls offer the player to choose between the two, while other items will always summon a private WRB.
Once summoned, a WRB stays on the overworld until defeated; they cannot naturally despawn.
Summoning Scrolls offer the player to choose between the two, while other items will always summon a private WRB.
Once summoned, a WRB stays on the overworld until defeated; they cannot naturally despawn.
WRB summoning items
 Summoning Scroll
 Monumental's Summoning Scroll
 Festive Summoning Scroll
 Crimson Summoning Scroll (Aries, Cerus, Perseus)
 Celestial Moondrop
Raid Pool
Summoning Scrolls Raid Pool
The most complex Raid Pool is that of the ![]() Summoning Scroll.
It is divided into two parts: permanent raids, available throughout the year, and event raids, available only during the event of said raid.
Summoning Scroll.
It is divided into two parts: permanent raids, available throughout the year, and event raids, available only during the event of said raid.
Permanent raids are:
- T6:
 Fey Gazer
 - T7:
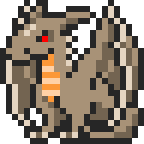 Fey Dragon,
 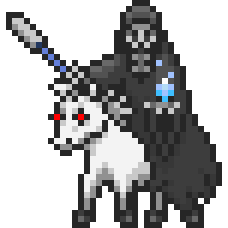 First Horseman,
  Yggdrasil
 - T8:
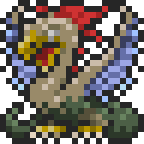 Fey Cockatrice,
 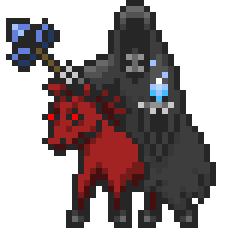 Second Horseman
 - T9:
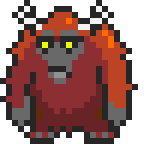 Fey Yeti,
 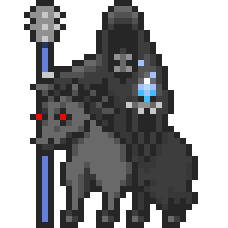 Third Horseman
 - T10:
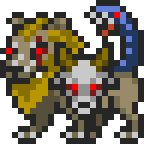 Fey Chimera,
 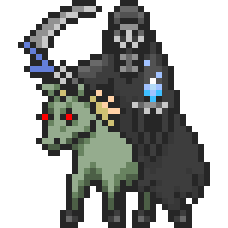 Final Horseman,
 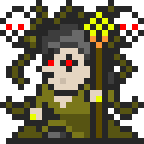 Arisen Morrigan,
 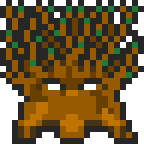 Arisen Yggdrasil,
 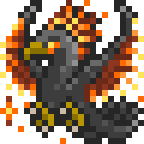 Ashen Phoenix
Depending on the event, numerous other raids can be summoned.
The full list of which raids can be summoned is found in List of Raids.
Event raids in the list with a ![]() icon can be summoned using Summoning Scrolls only while their event is active.
The Summoning Scroll only summons World Raids and cannot summon a Super Raid.
icon can be summoned using Summoning Scrolls only while their event is active.
The Summoning Scroll only summons World Raids and cannot summon a Super Raid.
Monumental's Summoning Scroll Raid Pool
The ![]() Monumental's Summoning Scroll summons raids from the event raids of the
Monumental's Summoning Scroll summons raids from the event raids of the ![]() Summoning Scroll.
Using it is exactly as using a regular Summoning Scroll but filtering out permanent raids.
It follows that while it summons event raids, it cannot summon raids that a Summoning Scroll cannot summon (Super Raids, raids which have their own summoning item).
Summoning Scroll.
Using it is exactly as using a regular Summoning Scroll but filtering out permanent raids.
It follows that while it summons event raids, it cannot summon raids that a Summoning Scroll cannot summon (Super Raids, raids which have their own summoning item).
Festive Summoning Scroll Raid Pool
![]() Festive Summoning Scrolls can only be used during the Winter Wild Hunts event.
They only summon event raids from active events, but aren't bound to the limitations of the
Festive Summoning Scrolls can only be used during the Winter Wild Hunts event.
They only summon event raids from active events, but aren't bound to the limitations of the ![]() Monumental's Summoning Scroll.
They are able to summon Super Raids as well as Kingdom Raids.
Furthermore, they ignore the at most 2 tiers below restriction of scrolls; they may summon raids more than 2 tiers below your own tier.
Monumental's Summoning Scroll.
They are able to summon Super Raids as well as Kingdom Raids.
Furthermore, they ignore the at most 2 tiers below restriction of scrolls; they may summon raids more than 2 tiers below your own tier.
They can be crafted during the Winter Wild Hunts event at the Monumental Guild in the Archcrafting section from 6 Stranger's Gift and 25 ![]() Proofs of Monument.
Proofs of Monument.
Crimson Summoning Scrolls and Celestial Moondrops
![]() Crimson Summoning Scrolls and
Crimson Summoning Scrolls and ![]() Celestial Moondrops are event items which summon from a very limited Raid Pool.
From an implementation point of view, they behave like Super Raids.
From a gameplay point of view, they do not feel like Super Raids: they are as strong as regular WRBs and their drops are on-par with other WRBs.
The List of Raids lists which raids are summoned by these items.
Celestial Moondrops are event items which summon from a very limited Raid Pool.
From an implementation point of view, they behave like Super Raids.
From a gameplay point of view, they do not feel like Super Raids: they are as strong as regular WRBs and their drops are on-par with other WRBs.
The List of Raids lists which raids are summoned by these items.
![]() Crimson Summoning Scrolls can be crafted during the Crimson Festival event at the Monumental Guild in the Archcrafting section from 10 Essence (Aries, Cerus, Perseus) and a
Crimson Summoning Scrolls can be crafted during the Crimson Festival event at the Monumental Guild in the Archcrafting section from 10 Essence (Aries, Cerus, Perseus) and a ![]() Summoning Scroll.
Summoning Scroll.
![]() Celestial Moondrops are dropped from Fallen Moonchasers and Fallen Crescent-Fencers during the Of Giants and Titans event.
Celestial Moondrops are dropped from Fallen Moonchasers and Fallen Crescent-Fencers during the Of Giants and Titans event.
Farming Summoning Scrolls
Sources
![]() Summoning Scrolls are mostly obtained from defeating
Summoning Scrolls are mostly obtained from defeating ![]() Balor Gateways (T7 or T9). You can also acquire them:
Balor Gateways (T7 or T9). You can also acquire them:
- As a drop from the
 Fey Yeti or
  The Fool (T9) WRB
 - As a reward for clearing a floor in a Tower of Olympia
- As a reward for clearing a floor in a Monument
- As a reward for clearing a dungeon
- From your Citadel (up to 3 Summoning Scrolls at once)
- From the Runeshop Daily Gift
- As a reward in the Archpath
- From a Guild Shop (except Circle of Anguish)
- Blade of Finesse: 50
 Proofs of Sparring
 - Conqueror: 15
 Proofs of Crownship
 - Fishing: 500
 Corals
 - Monumental: 30
 Proofs of Monument
 - Oracle Temple: 50
 Proofs of Remembrance
 - Spelunking: 250
 Refined Deepshards
 - Titanfelled: 5000
 Tower Shards
 - Traveler: 8
 Proofs of Distance
- Blade of Finesse: 50
Farming
If targetting only ![]() Summoning Scrolls, the fastest way would be running
Summoning Scrolls, the fastest way would be running ![]() Underworld Portals or
Underworld Portals or ![]() Chaos Portals.
Otherwise, running regular dungeons, the preferred tiers are T9, then T10, then T8 and finally T7.
Chaos Portals.
Otherwise, running regular dungeons, the preferred tiers are T9, then T10, then T8 and finally T7.
The introduction of guilds has given rise to more ways of farming Summoning Scrolls passively while taking on other activities. The most notable ones are the Titanfelled and Monumental guilds. Both these guilds allow for farming their currency to buy Summoning Scrolls while granting a chance at earning them while farming the currency.
Notes:
- Balor Gateways can very rarely be found on the overworld, but only in Moonlight weather (or by using Chaos Scrolls). We ignored that in this section, as this is by no means a reliable way of farming Summoning Scrolls.
- Summoning Scrolls are not a guaranteed drop from Balor Gateways, even when reaching the Luck cap.
- Party Dungeons are preferred to solo dungeons. With a full party of 4, each member can enter the dungeon as a host for the others, meaning a single dungeon location can lead up to 4 runs.
Kingdom Raids
Cost, availability to members Event raids != from WRB sometimes Different enrage% Link to Kingdom Page List of Kd raids link below
Super Raids
Super Raids are stronger World Raids that mean to be a "final boss" for the event.
Differences from WRB
- Super Raids cannot be summoned by a
 Summoning Scroll or a
  Monumental's Summoning Scroll.
 - Items dropped from Super Raids do not appear in the Monumental Guild Shop to be rolled expending Proofs of Avarice.
Super Raid summoning items
 Scroll of Anguish
- Bought from the Circle of Anguish Guild Shop for 90
 Proofs of Melancholy
- Bought from the Circle of Anguish Guild Shop for 90
 Beastfelled Summoning Scroll
- During the Beastfelled event in the Monumental Guild in the Archcrafting section
- 7 Kerberos Furs, 7 Manticore Hearts and 7 Monoceros Horns
- During the Beastfelled event in the Monumental Guild in the Archcrafting section
 Scroll of Dynasty
- During the Thronemakers event in the Monumental Guild in the Archcrafting section
 Windtamer's Summoning Scroll
- During the Fallen Heroes of Avalon event in the Monumental Guild in the Archcrafting section
- 10 Hippogriff Talons, 10 Hippogriff Tails and 10 Hippogriff Quills
- During the Fallen Heroes of Avalon event in the Monumental Guild in the Archcrafting section
 (Fey) Scroll of Ragnarok
- During the Nothren Legends: Ragnarok event in the Monumental Guild in the Archcrafting section
 Tablet of Hyperion
- During the Of Giants and Titans event in the Monumental Guild in the Archcrafting section
 Arisen Scroll of Rift Distortion
- During the Rift Distortion event in the Monumental Guild in the Archcrafting section
 (Arisen) Hallowed Summoning Scroll
- During the The Hallowed event in the Monumental Guild in the Archcrafting section
- Hallowed Summoning Scroll: 2 Dried Oaks, 2 Rotten Leaves, 2 Refined Sugars, 2 Tattered Clothwraps, 2 Chiroptera Remains and 2 Fragments of the Planet's Core
- Arisen Hallowed Summoning Scroll: 3 Dried Oaks, 3 Rotten Leaves, 3 Refined Sugars, 3 Tattered Clothwraps, 3 Chiroptera Remains and 3 Fragments of the Planet's Core
- During the The Hallowed event in the Monumental Guild in the Archcrafting section
Sharing raids
Raids as a trading currency
Mirroring
Sanding
Sanding a Raid means hitting it for as little damage as possible with the only goal being to enter the Raid drop pool. Any player who deals 2 or more damage to a Raid is eligible for Raid rewards. Since items from raid have a minimum (TBD) chance of dropping, even hitting Arisen Morrigan (34MHP) for 2 damage may reward the player with multiple items. Sanding effectively increases the overall rewards sent out from a defeated Raid.
Let's assume the minimum drop chance for an item is 1%. The maximum drop chance for a legendary-rarity item is 45%. Ashen Phoenix has 11,300,000 HP.
In a perfect (and also unreasonable) scenario, 5,650,000 people could hit it for 2 damage. This means the assumed 1% drop chance for a legendary-rarity item would be rolled 5,650,000 times, yielding an average of 56,500 items to the community (not to individual players).
In a more realistic scenario, let's assume 10 players hit the raid for 1000 damage each and the 11th player finishes the raid (for 11,290,000 damage out of the 11,300,000 HP). The 10 sanding players each have the assumed 1% drop chance for the legendary-rarity item. The 11th player would have dealt ~99.91% damage to the raid and would have an ~44.96% chance of receiving the legendary-rarity item. The 0.04% drop chance the 11th player gave up in letting the 10 players sand offers them an assumed 1% drop chance each.
Sanding takes its name from the Sands of Aaru spell. This spell has a high stat multiplier (meaning it can easily pierce the Raid's defences) but a very low damage multiplier (meaning that once defences are pierced, the damage won't be high). It also has the advantage of working with both Magic and Attack based builds, taking whichever stat is the highest. It is the recommended spell to use for sanding.
Various tips for sanding
- Do not bring any pet / summon with a damaging attack move
- Lower-tier classes have less base offensive stats, making them easier to bring low enough to not deal more than 1000 damage
- Arisen Monster Tomes (-125) and Mighty Mimic Heads (-50) of high quality heavily bring your offensive stats down if needed (attack and magic in equal amounts)
- Another more expensive option is using Titan augments (Lungs of Eos (-135), Legs of Eos (-60), Lungs of Selene (-45)). They will need to be of high quality to negate the celestial weapon's stat.
- Other adornments of note are Ashen Pinion (-40) and Stardust (-30)
- Sands of Aaru never misses, ensuring your damage on turn 1 before you get attacked and making defensive stats meaningless (do still keep enough Mana)
- If your class of choice does not have Mystic Feather or Second Chance, you may often be quickly forced out of a fight, saving you a bit of time if you need to sand a lot of raids
- Sanding not only applies to WRB but also to Kingdom Raids
- Beware of passives whose stat increase may vary
- Passives such as Power of the Gods (e.g.: Gaia) which increase stats and are visible in the Status menu
- Passives such as Iconoclast (e.g.: Heretic) which increase stats depending on the battle state and are invisible in the Status menu
- Global passives such as Origin Town which add 10% to your stats (visible in the Status menu)
Perfect sanding stats
The following table is an attempt to find the perfect offensive stat value for every raid to deal 2 damage using Sands of Aaru. The damage dealt depends on the defensive stats of the Raid. Thankfully, their Defence and Resistance stats are equal, so there is no difference in the Attack or Magic needed. Figuring out the defensive stats of Raids is a work in progress. Only Raids whose stats are known are listed below.
| Name | Tier | ||
|---|---|---|---|
| Arisen Balin | 10 | 2474 | 507 |
| Arisen Ebon Scruug | 10 | 2574 | 527 |
| Arisen Fenja | 10 | 1958 | 404 |
| Arisen Gerd | 10 | 1958 | 404 |
| Arisen Judge Charon | 10 | 2750 | 562 |
| Arisen Judge Rhada | 10 | 2750 | 562 |
| Arisen Kerberos | 10 | 1782 | 368 |
| Arisen Morrigan | 10 | 5114 | 1035 |
| Arisen Rift Judgement | 10 | 2750 | 562 |
| Arisen Yggdrasil | 10 | 2574 | 527 |
| Ashen Phoenix | 10 | 2034 | 419 |
| Fey Chimera | 10 | 2034 | 419 |
| Final Horseman | 10 | 2034 | 419 |
| Finesse | 10 | 2574 | 527 |
| Great Anguish | 10 | 5544 | 1121 |
| The Last Hippogriff | 10 | 2034 | 419 |
| Turned King Lyncus | 10 | 2342 | 480 |
| Arisen Cade | 9 | 2070 | 426 |
| Fey Yeti | 9 | 1670 | 346 |
| Noble Perseus | 9 | 1890 | 390 |
| The Fool (T9) | 9 | 2070 | 426 |
| The Mightiest Mimic | 9 | 2040 | 420 |
| Third Horseman | 9 | 1670 | 346 |
| Almighty Balin | 8 | 1200 | 252 |
| Fallen Judge Charon | 8 | 1680 | 348 |
| Fallen Judge Charon | 8 | 1680 | 348 |
| Fenja | 8 | 1144 | 241 |
| Fey Cockatrice | 8 | 1200 | 252 |
| Kerberos | 8 | 1200 | 252 |
| Mimic King of Kings | 8 | 1792 | 370 |
| Second Horseman | 8 | 1200 | 252 |
| Sister Macha | 8 | 1512 | 314 |
| Fey Dragon | 7 | 924 | 197 |
| Grand Knight Lugus | 7 | 1000 | 212 |
| Ingenious Cade | 5 | 338 | 80 |
The offensive stat is the minimum you need to hit for at least 2 damage. Due to the wide range of Sands of Aaru's damage multiplier, damage can range from 2 to 4.
Offensive stats 1 or 2 points below that indicated may hit for only 1 damage. Offensive stats 1 or 2 points above that indicated reduces the odds of hitting for 2 damage and may also hit for 5 damage. Above that, scaling goes according to Sands of Aaru's damage multiplier.
You can expect your damage to be between 2 + stat_above * 0.07 and 4 + stat_above * 0.15, with stat_above the difference between your offensive stat and that listed in the table.
You should not be 2656 stat points above, as this makes it possible to hit for more than 1000 damage.
The above table was generated by reversing the damage formula. Instead of the damage being a variable, we use the offensive stat.
Where the damage formula is (PvE, using mag as an example):
\[ \text{damage} = \lfloor(\text{mag}*\text{stat-multiplier} - \frac{\text{res}}{2}) * \text{damage-multiplier} \rfloor \]
We can reorder terms to have:
\[ \text{mag} = \lceil (\frac{\text{damage}}{\text{damage-multiplier}} + \frac{\text{res}}{2}) / \text{stat-multiplier} \rceil \]
We replace stat-multiplier with Sands of Aaru's one (2.5) and damage-multiplier with its lowest bound (0.07).
We can also replace damage with 2, which is our target damage.
List of Raids
So as to not span the columns too wide, the following abbreviations are used in the heading:
T= TierSS= Summoning Scroll
K= KingdomAW= Arisen Waygate
| Name | T | SS | K | AW | Other |
|---|---|---|---|---|---|
| Age-Old Mimic | 5 | ||||
| Almighty Balin | 8 | ||||
| Aloof Aries | 9 | Crimson Summoning Scroll (Aries) | |||
| Apollyon | 9 | ||||
| Aries | 6 | Crimson Summoning Scroll (Aries) | |||
| Arisen Asteria of Olympia | 10 | Celestial Moondrop | |||
| Arisen Atlas of Olympia | 10 | Celestial Moondrop | |||
| Arisen Balin | 10 | ||||
| Arisen Cade | 9 | ||||
| Arisen Covyn | 10 | ||||
| Arisen Ebon Scruug | 10 | ||||
| Arisen Fenja | 10 | ||||
| Arisen Gerd | 10 | ||||
| Arisen Hel | 10 | ||||
| Arisen Judge Achlys | 10 | ||||
| Arisen Judge Charon | 10 | ||||
| Arisen Judge Rhada | 10 | ||||
| Arisen Kerberos | 10 | ||||
| Arisen Menja | 10 | ||||
| Arisen Merlin | 9 | ||||
| Arisen Morrigan | 10 | ||||
| Arisen Naggeneen | 9 | ||||
| Arisen Ophion of Olympia | 10 | Celestial Moondrop | |||
| Arisen Phoenix | 9 | ||||
| Arisen Pumpkinhead | 10 | ||||
| Arisen Pumpkinless | 10 | Arisen Hallowed Summoning Scroll | |||
| Arisen Quetzalcoatl | 10 | ||||
| Arisen Rift Judgement | 10 | Scroll of Arisen Rift Distortion | |||
| Arisen Surtr | 10 | ||||
| Arisen Thronemaker Neith | 10 | ||||
| Arisen Thronemaker Ptah | 10 | ||||
| Arisen Thronemaker Sekhmet | 10 | ||||
| Arisen Warlock Trevelyan | 9 | ||||
| Arisen Yggdrasil | 10 | ||||
| Ashen Phoenix | 10 | ||||
| Asteria of Olympia | 8 | Celestial Moondrop | |||
| Atlas of Olympia | 8 | Celestial Moondrop | |||
| Beguiled Apollyon | 10 | ||||
| Beguiled Apollyon X | 10 | Use a Balor Mnemonic to be teleported Arisen-Waygate-style to a place where Beguiled Apollyon X is. | |||
| Beguiled Apollyon Y | 10 | Use a Balor Mnemonic to be teleported Arisen-Waygate-style to a place where Beguiled Apollyon Y is. | |||
| Cerus | 6 | Crimson Summoning Scroll (Cerus) | |||
| Covyn | 5 | ||||
| Dangy | 7 | ||||
| Dracon | 3 | ||||
| Ebon Scruug | 9 | ||||
| Fallen Judge Achlys | 6 | ||||
| Fallen Judge Charon | 8 | ||||
| Fallen Judge Rhada | 7 | ||||
| Fallen King Arthus | 8 | ||||
| Fallen Merlin | 6 | ||||
| Fallen Warlock Trevelyan | 6 | ||||
| Fenja | 8 | ||||
| Ferocious Cerus | 9 | Crimson Summoning Scroll (Cerus) | |||
| Fey Chimera | 10 | ||||
| Fey Cockatrice | 8 | ||||
| Fey Dragon | 7 | ||||
| Fey Gazer | 6 | ||||
| Fey Jormungandr | 10 | Fey Scroll of Ragnarok | |||
| Fey Yeti | 9 | ||||
| Final Horseman | 10 | ||||
| Finesse | 10 | ||||
| First Horseman | 7 | ||||
| Flax44 | 9 | ||||
| Fomor | 4 | ||||
| Furious Cerus | 9 | ||||
| Gerd | 8 | ||||
| Grand Knight Lugus | 7 | ||||
| Great Anguish | 10 | Scroll of Anguish | |||
| Great Murk | 8 | Available during Terra's Legacy at Gloomsites | |||
| Great Murk | 9 | Available during Terra's Legacy at Gloomsites | |||
| Great Murk | 10 | Available during Terra's Legacy at Gloomsites | |||
| Great Sphinx | 10 | Scroll of Dynasty | |||
| Havel | 6 | ||||
| Hel | 5 | ||||
| Hyperion | 10 | Tablet of Hyperion | |||
| Ingenious Cade | 5 | ||||
| Jormungandr | 8 | Scroll of Ragnarok | |||
| Kerberos | 8 | ||||
| King of Ljosalfar | 5 | ||||
| Last Titan | 6 | ||||
| Maelor | 7 | ||||
| Menja | 7 | ||||
| Mimic King of Kings | 8 | ||||
| MmmPizza | 6 | ||||
| Mochi | 5 | ||||
| Naggeneen | 7 | ||||
| Noble Perseus | 9 | Crimson Summoning Scroll (Perseus) | |||
| ob | 5 | ||||
| Ophion of Olympia | 8 | Celestial Moondrop | |||
| Orochi | 8 | ||||
| Perseus | 6 | Crimson Summoning Scroll (Perseus) | |||
| Phoenix | 7 | ||||
| Pumpkin Spider | 4 | ||||
| Pumpkinhead | 8 | ||||
| Pumpkinless | 8 | Hallowed Summoning Scroll | |||
| Purrly | 8 | ||||
| Rift Judgement | 8 | Scroll of Rift Distortion | |||
| Scruug | 5 | ||||
| Second Horseman | 8 | ||||
| Sister Badb | 7 | ||||
| Sister Macha | 8 | ||||
| Sister Neman | 6 | ||||
| Starlord | 5 | ||||
| Surtr | 5 | ||||
| Tatzelwurms | 5 | ||||
| The Creator | 10 | ||||
| The Dioscuri | 9 | This is an "old" kingdom raid who no longer is available. | |||
| The Fool | 6 | ||||
| The Fool | 9 | ||||
| The Last Hippogriff | 10 | Windtamer's Summoning Scroll | |||
| The Mightiest Mimic | 9 | ||||
| The Morrigan | 10 | ||||
| Third Horseman | 9 | ||||
| Thronemaker Neith | 6 | ||||
| Thronemaker Ptah | 8 | ||||
| Thronemaker Sekhmet | 7 | ||||
| Tricky Aries | 9 | ||||
| Turned King Lyncus | 10 | Beastfelled Summoning Scroll | |||
| Untarnished Perseus | 9 | ||||
| Yggdrasil | 7 | ||||
| Young Apollyon | 5 | ||||
| Zeus | 9 |